

Tostitos are so last season!

#WHATHEALTHYMODELSEAT
I have fallen in love with Flamous’ Falafel chips. That’s right, you heard me: falafel in chip form! It’s a crunchy Mediterranean heaven.
Last week, I was on the hunt for healthy tortilla chip alternatives and came across many that were either loaded with sodium or preservatives and/or containing funky ingredients that my body wouldn’t be able to digest. So Flamous Brand came to my rescue. The company generously sent me a large case of 3 of their famous chips: Original Falafel, Sprouted Multigrain Zatar and Spicy Falafel. It’s Wednesday and there’s not a crumb left. They were that good.
I brought a bag to share on set of one of my photo shoots and it was the talk of the evening. One of the crew members who’s of Middle Eastern descent couldn’t believe how authentically good they tasted compared to the ones her “teta” used to hand make back home. Known for their famous explosion of exotic flavour, they are made with real, all natural organic ingredients. No added preservatives or artificial flavours, free of GMO and MSG, gluten free, dairy free, wheat free, sugar free and low in sodium. Like really low. About 28 grams of chips has only 79 grams of sodium. They’re also rich in protein, fiber and anti oxidants which we get mostly from their main ingredient: non GMO whole beans (chickpeas, fava beans, black beans, pinto beans.) Everything we want in a tortilla chip, right? Right. But don’t overdo it though. Corn is a considered wholegrain and contains a lot of fiber but they’re also heavy in carbohydrates and it sits high on the glycemic index.
The bag I kept for myself was the Zatar flavour. Made with similar ingredients to the Original Falafel, these bad boys contain some of my ultimate favourite foods: sprouted organic brown rice, brown flax and buckwheat. I always prefer the healthier bag of chips. And my waistline prefers it that way.
I’ve liked them on Facebook and you should too: www.facebook.com/FlamousBrands
While you’re there, grab a bag and taste these all star chips for yourself!
These are some of the benefits of eating sprouted grains and seeds:
– Increases digestibility: Sprouting breaks down the starches in grains into simple sugars so your body can digest them much better. Plus, sprouted grains are easily digestible.
– Increases mineral absorption: Helps to break down enzyme inhibitors so that your insides have help easily absorbing iron, magnesium, calcium, zinc, etc.
– Increases anti oxidants and vitamins: In processed and refined grains, they have been stripped from most of their nutrients since the bran and germs have been removed. Sprouting releases more vitamins and anti oxidants that are naturally found in the grains/seeds. Also helps produce more vitamin C and increases vitamin b12.

Healthy Vegan Sorbet – Sugar Free

#WHATHEALTHYMODELSEAT
2 ingredients makes for a delicious, healthy sorbet treat.
I love coconut milk. I love strawberries. When I put both together, I create heaven. Most ice creams, sorbets and frozen yogurt aren’t good for you since they contain a whack load of sugar, dairy and other preservatives your body doesn’t need. But you can’t deprive yourself of a delicious cold treat now can you? That wouldn’t be fair. So I discovered how to make a super easy sorbet with two of my favourite ingredients in the whole world. And I didn’t even need an ice cream maker. Although, I’ve been nudging at my boyfriend to buy me one these days. 😉
1 pound of chopped organic strawberries (fresh or frozen)
1 cup of unsweetened coconut milk (use a full fat can, like the Aroy-D brand, not light ‘cuz it won’t be as creamy)
Additional: a packet of stevia, 1 teaspoon of vanilla extract powder, 1 teaspoon of lemon juice squeeze
Add both ingredients in a high power blender or food processor and puree until smooth. Transfer mixture into a bread loaf pan and cover with plastic wrap. Freeze for at least 3-4 hours. Remove sorbet from freezer and puree once more in your blender or food processor. Return strawberry puree back into loaf pan, cover and freeze for another 3-4 hours before serving.
Serves 6. Sugar free, low carb, gluten free, dairy free and addictive!
Healthy Chocolate Ganache Tart – Grain Free, (Refined) Sugar Free, Gluten Free & Vegan!

Happy Monday! I have been baking non stop this week trying to learn some brand new health conscious recipes to share with you. Of course, I tweak them so that they’re suitable for all diets and food allergies. Keeping your desserts and snacks healthy and wholesome can be delicious and fun! That way, you won’t feel bad about “accidentally cheating” or your healthy lifestyle diet is maintained and consistent.
Over the long weekend, Toronto finally had some yummy weather. The sun was out, the skies were bright blue and you could smell spring awakening. I adore the outdoors and when the sun is out, I’m out! So I invited my friends over for an outdoor Sunday brunch to take advantage of the weather. I prepared healthy dishes that we all enjoyed but for dessert, I wanted to make something that was satisfying and didn’t taste like ”cardboard” to them. Most of my friends have major sweet tooths so I definitely had to step my game up and prove to them that decadent sweets can be healthy too! So I decided to make a healthy chocolate tart. It was so good that we ate right out of the pan. Who needs plates anyway? With the perfect amount of sweet and crumbles, you definitely won’t feel like you’re missing out anything!
Crust
1.5 cups of almond meal (I like Bob’s Red Mill almond flour)
1/2 cup of organic coconut flour (I like Let’s Do Organic coconut flour)
2 tablespoons of flax seed meal (make sure it’s ground!)
1/4 teaspoon of baking soda
4 tablespoons of melted organic virgin coconut oil
1/2 teaspoon of pure vanilla extract
Optional: 2 teaspoons of cacao powder or a dash of cinnamon
Preheat oven to 350 F. Lightly grease a 9 or 10 inch tart pan with coconut oil. In a large bowl, add all of the crust ingredients and mix well. Make sure it’s combined well. To test, grab a handful of batter and squeeze together. It should hold together and feel moist. If it’s falling apart completely, you can add a tiny bit more of melted coconut oil but the batter shouldn’t be super oily. Pour the crust mix into the tart pan and with your fingers, press down firmly into the pan and distribute evenly making your way to the edges. Bake for 15-18 minutes or until golden brown.
Ganache Filling
1/2 cup of unsweetened canned coconut milk (full fat not light)
1 teaspoon of pure vanilla extract
2-3 packets of stevia extract (or to your liking)
8 ounces of unsweetened, non dairy chocolate, finely chopped (I like stevia sweetened pure chocolate like Lily’s Sweets or Dante’s Confections or you can make your own like the recipe below! Don’t buy a marked “sugar free” chocolate because they usually contain a lot of artificial sweeteners like malitol or aspartame!)
Put chopped chocolate in a large bowl. In a saucepan, bring coconut milk to a boil. Add vanilla extract and stevia sweetener. Pour hot milk into bowl of chocolate and let sit for one minute until chocolate has melted. Stir until smooth and creamy. Pour chocolate mixture into prepared cooled crust. Cover with plastic wrap and refrigerate for at least 4 hours until fully set. Once firm, top with fresh cut fruit and lightly sprinkle 1/2 cup of unsweetened coconut shredding and 1/4 of sliced almond flakes. Serve and enjoy!
Want to make your own chocolate like I did for this tart? Here’s how:
This recipe makes 1 bar. Make sure you have enough for your chocolate ganache filling.
1/4 cup of melted extra virgin organic coconut oil (cold pressed)
1/4 cup of organic raw cacao powder (Make sure you use raw cacao powder and not highly processed, low grade cocoa. I LOVE Marche Organics Raw Cacao Powder and use it for most of my chocolate baking and as a super food!)
*Can add 2 tablespoons of pure coconut/cacao butter or coconut cream for a creamier chocolate texture.
1/4 teaspoon of alcohol free stevia drops (NuNaturals brand makes a great one with vanilla flavouring or you can use a few packets of pure stevia extract. Adjust to your sweet tooth but a little stevia goes a long way)
Combine all ingredients in a bowl. Place the mixture in a silicon muffin tin or glass square container lined with parchment/wax paper or plastic wrap. Freeze until solid – about one hour or so. Store in freezer. If left out, the chocolate will melt as coconut oil has a low melting point.
Best part about making your own chocolate is that you can control what’s in it by adding tasty options like organic sprouted crispy brown rice, unsweetened shredded coconut, nuts, etc.
Raw cacao is rich in natural anti oxidants and contain many health benefits. It has more than 300 nutritional compounds and helps to neutralize free radical buildup from the pollution, sun exposure, smoking, etc. It is considered to be one of the most natural foods with the highest antioxidant value. This dubbed “superfood” is also packed with sulfur which is associated with strong nails, shiny hair and a healthy liver and pancreas. It can be a guilt free treat that’s packed with powerful benefits. Of course, you can’t have too much of a good thing. Use raw cacao to complement your meals in moderation. It is high in caffeine and theobromine which are both stimulant compounds naturally found in cacao beans. Cacao can be addictive (as many of us know from over eating Halloween chocolates!) Overusing it may lead to insomnia, anxiety disorders, migraines, leaky guts, extreme energy shifts and toxicity.
Drink Your Greens

#WHATHEALTHYMODELSEAT
Green has always been my favourite colour. I’m an avid green tea drinker, I prefer green apples than the red ones and the best veggies are green! So it’s no shock that I’ve been a vegetarian/vegan for almost 8 years. I admit, when I first started, I wasn’t the healthiest vegetarian. I thought eating cheese and vegetarian burgers would do it for me but overtime, my body started reacting to the bad food I assumed was “healthy” for me. Sometimes we deny our bodies that ability to tell us what it really needs for sustenance. We ignore it by feeding them with food that we want; the food that makes us feel full and satisfied like our over furnished cravings. But feeling full isn’t enough. The majority of us are over fed with crap food and under nourished with nutrients and substance.
I have friends who think they can get away with just eating carrots, lettuce and potatoes as their side of vegetables. Or then there’s those that buy protein powders and vitamin supplements that contain vegetable like ingredients so they don’t need to bother eating the real deal. We are getting by eating food like products and not the real stuff. Our bodies will be more susceptible to many more ailments, diseases and allergies.
Non starchy vegetables, especially dark leafy greens, should be your main dish. Everything else like your complex carbs, fats, starchy vegetables (or meat – if you’re not yet a vegetarian) should be your side dishes. We’ve deluded ourselves all these years that “protein” (like meat, fish or beans) is the most important thing to be getting and that “eating your vegetables” comes second. The right kind of vegetables do contain a lot of protein! Broccoli, kale, spinach, spirulina, sprouts, collard chards – all greens that contain a high amount of protein. On top of that, they contain more nutrients and vitamins than any piece of steak you’ll eat.
How can you incorporate more greens into your diet? It can be time consuming to constantly chop your vegetables and eat a huge salad every 3-4 hours. One of the best ways to minimize your time in the kitchen is to prep your food in advance. I go to the market to pick up fresh fruits and vegetables every 2-3 days. Divide your vegetables into BPA free containers so that it’s easily accessible and convenient. Plus, you’ll want to eat more of it since it’s already been prepared.
Once you’ve prepped your vegetables, you can start blending/juicing! A great way to add more greens to your everyday diet is to drink them. You can customize it to your liking and it’s a delicious way of getting your daily dose of veggies. Instead of drinking sugary, fruit smoothies, try this favourite blend for some detoxing:
A handful of spinach, kale and lettuce. A squeeze of lemon. A tiny bit of parsley. One green apple. 250 ml of water (or more) and a scoop of spirulina and/or chia seeds. Optional: tiny bit of grated ginger. Blend on high for 1 minute. Add ice if needed. Make it fun by pouring your yummy potion into a cute mason jar.
Green is the way to go!
Vegan “Buttermilk” Griddle Cakes – Allergy Friendly

#WHATHEALTHYMODELSEAT
Pancake addict.
I have a problem. I love pancakes too much. Ever since I learned to perfect them in South Africa, I’ve been making them every week.
Here’s one made with organic sprouted brown rice flour: http://notanothermodelblog.tumblr.com/post/82205960244/whathealthymodelseat-pancakes-that-are-gluten
Here’s one made with organic coconut flour: http://notanothermodelblog.tumblr.com/post/77197988896/whathealthymodelseat-mini-coconut-chia-seed
And the recipe I’m about to share with you is a mixture of both. Let them eat buttermilk griddle cakes!
1 cup of organic brown rice flour
1/3 cup of organic coconut flour
1 teaspoon of baking soda
1 cup of unsweetened almond milk (or dairy free milk of choice)
2 teaspoons of coconut oil
1 tablespoon of apple cider vinegar
2 flax eggs (2 teaspoons of flax seed meal + 6 teaspoons of warm water) chia meal works too!
Whisk the milk and apple cider vinegar to make your vegan buttermilk. Let stand. Add flax eggs to the mix with melted coconut oil. Mix the dry ingredients together in another bowl making sure there are no clumps. Combine the wet ingredients to the dry ingredients. Mix it up! Pour pancakes into preheated skillet lightly greased with coconut oil and cook on medium heat. Use a spatula to flatten pancakes. Coconut flour is very delicate so make sure they’re small enough to flip. Flip pancakes when they start to bubble. Serve with fresh fruit and pure roasted almond butter (or any other nut butter – who am I to tell you what to do) and make sure to save some for me!!
Easy peasy flat flaxbread

#WHATHEALTHYMODELSEAT
Fo sheasy!
Drop that bread roll! Don’t do it….just don’t. Bread, crackers and even whole wheat tortilla wraps are not doing our bodies any good. In fact, one of the most common allergies that a lot of us are struggling with is wheat. They’re high in carbohydrates and spikes the sugar levels very high making it harder for our bodies to properly digest and causes us to store more fat than we should. Even brown bread commercially labeled “whole grain” won’t do you any good. It’s just the lesser evil twin of white bread.
But of course, you’re human. (I hope!) And you desire carbs to go with your soups, stews, pasta or salad dishes. Of course, you’d like it to be healthy, body conscious and free of all the harmful ingredients so that you don’t feel guilty afterward. Here’s a recipe for a gluten/wheat free flat bread that’s also dairy free, egg free, sugar free and low carb. This flat bread is mainly made with flax seed meal (ground flax seeds) and is another great replacement for wheat or corn flour. Like chia seeds, you’ll be happy to know that it’s high in fiber, omega 3 fatty acids and contains lignans which help to reduce the risk of breast cancer in women and prostate cancer in men. Another powerful little seed you can add to your diet. 😉
3 tablespoons of flax seed meal (you can grind up flax seeds in a processor or high power blender if you want)
2 tablespoons of almond flour
1 tablespoon of gluten free buckwheat flour (oat or quinoa flour might work too)
1/2 teaspoon of hemp protein powder
1/2 teaspoon of xantham gum (gluten free)
1/4 teaspoon of baking soda
1/4 teaspoon of extra virgin olive oil
1/2 teaspoon of apple cider vinegar
4 tablespoons of filtered warm water
1 tablespoon of coconut milk (you can sub with almond milk)
Herbs and spices for taste: himalayan sea salt, black pepper, dried oregano, onion powder, garlic powder, dried parsley, paprika
Preheat oven to 375 F. Combine all the dry ingredients in one bowl and mix well. Whisk together wet ingredients in another bowl. Beat wet ingredients into dry ingredients vigorously with your handy whisk. You can also put in a mixer if you want. Using your hands, knead batter onto parchment paper or a baking mat in the shape of a ball. Place another piece of parchment paper on top and knead the dough into a flat shape. You can use a rolling pin to be more precise but as you can tell in my photo, I did some freestyling on mine. Remove top parchment paper and press down some more making sure there are no bubbles. Bake on a cookie sheet for 8 minutes. Remove and let cool. Store in a ziplock bag or container and have it with a side of quinoa salad like I did here. 🙂
FYI: If you over bake them, they’ll be crispier and if you under bake them, they’ll be a little more doughy like.
Healthy Jos Louis Cake

#WHATHEALTHYMODELSEAT
Jos Louis. Remember those? Here’s a healthier one that’s gluten/wheat free, vegan and sugar free.
I remember the days when I didn’t listen to my grandma’s advice about packing my lunch for school the night before. I wasn’t a morning person (okay, I’m still not a morning person) and would rush to get my stuff together before barely making it to class. One of the things I remember mindlessly grabbing in the pantry for a healthy balanced “lunch” was a Jos Louis cake. Sometimes I grabbed two. That means for lunch I’d have 240 pointless calories served with 28 grams of sugar. Gawd, I’m glad those days are over!
Here’s a better version that you can have for a breakfast treat, snack or dessert:
1- 1/2 cups of organic brown rice flour
1/3 of granulated xylitol
1/5 stevia extract powder (this can be adjusted depending on how sweet you wanna get!)
1/4 pure organic cacao powder (not cocoa)
2 teaspoons of baking soda
1/3 of melted organic virgin coconut oil
1 cup of non dairy milk of choice (unsweetened almond milk or light coconut milk will do but to cut your calorie and fat in take, use almond instead)
1/4 cup of flax meal or ground chia seed
1 teaspoon of organic apple cider vinegar (or pure lemon juice)
1 teaspoon of pure vanilla extract (non alcohol preferably)
Preheat oven to 350 F. Line muffin pan or use small oven safe ramekins like I did. Combine all the dry ingredients except the flax/chia meal together forking away the clumps. In a separate bowl, whisk together the wet ingredients with the flax/chia meal. Using a hand blender or your arm muscles, bring the dry ingredients into the wet ingredients until completely blended. Pour batter into muffin tin (about 2/3 full for each) and bake for 18 minutes or until fork/toothpick inserted in center is no longer wet (there may be crumbs still on it which is ok!) Cool for a few minutes before icing with chilled coconut milk whipped cream.
Making a dairy free, vegan, sugar free icing is deliciously easy:
Refrigerate a can of organic, unsweetened, preservative and emulsifier free coconut milk overnight. I love using Thai Kitchen’s Premium Coconut Milk or A Taste of Thai Coconut Milk. Only two ingredients in both: coconut milk and guar gum for stabilizing. Do not use a fat free or light version – you will break my heart. Plus it won’t harden or firm up easily. After a night pf patience and healthy sweet dreams, take your well-chilled can out and open from the bottom. There resides the watery part of the can. You will not be whipping this part. Drain the liquid out and save for another dish or add to your smoothies. Scoop the hardened coconut cream out into a chilled bowl. Add a pack (or two) of white stevia extract powder with 1/4 of vanilla extract and whip with whisk or use a hand mixer. If you want it more like a frosting, place in fridge for another few minutes and keep it cool. Add to your desserts and store the rest in the fridge sealed. Should be good for about 1.5 weeks or so. I guarantee you’ll be wanting to do this often so make sure to stock up on some cans and leave them in your fridge for easy access. 😉
Hair Talk

When I was a pre-teen, I wanted pin straight light brown hair with red bottom streaks. All the cool kids had them while I was stuck with this boring thick, unruly dark brown mane that bothered me so much. My grandma didn’t “allow” me to colour it and gave me hell everytime I straightened it in the morning. She’d say things like, “Why do you need to dye it?”, “You’re so young. You are gonna ruin your hair.” and “Don’t be stupid. Your hair is fine. Stop asking man.” (My grandma is the coolest grandma you’ll ever meet by the way.)
So I never got to colour it. There was this one time that I picked up my grandma’s hair dye in the washroom and was about to do it myself but the smell of ammonia and detailed instructions turned me off. I never bothered since then.
This is my natural hair up to date.
I’ve been growing my hair for about 3-4 years from shoulder length. It’s like my security blanket. I don’t do much to it (or at all) because a) I’m lazy and b) I like to keep it natural. And I now respect and appreciate my grandma’s strict ways because had I not listened to her, I probably wouldn’t have been able to grow it out as healthy as I have.
These are some of the basic (and inexpensive) things I do to keep it healthy and natural:
Extra virgin coconut oil (cold pressed) – Use it as a hair conditioner for the ends AND the scalp/roots or use it as a leave in conditioner. You don’t need a lot of it as a little goes a long way. If you end up putting too much, you will need to do a few luke warm water rinses. One of the many amazing properties of coconut oil is that it’s anti-fungal. So for those with eczema or dandruff, apply to irritated skin at least 1-3 times a week and massage through scalp.
Baking soda – The same rules I have with my food, I have with my products as well. In the quest to use more natural ingredients in my everyday life, I stumbled upon the underrated baking soda. I very rarely use commercial shampoo products on my hair. Most of the brands contain a heck load of harmful ingredients that strip out the natural oils in your hair. The “lather” in harsh shampoos and soaps is usually a combination of chemicals and detergents that yes, clean your hair, but also make your strands dull and dry and eventually contribute to damaging your locks. Use baking soda as an easy way to clean hair. Start by mixing 1 part baking soda with 3 parts water. Apply to roots and work your way down to the ends. Let sit for 1-2 minutes then rinse out with cold water.
Apple cider vinegar – This goes great after cleaning your hair with baking soda. An ACV rinse is a great anti bacterial treatment for hair as it balances the scalp pH, removes product buildup, adds elasticity and helps to treat scalp conditions and hair loss, just to name a few. When I tell people about this, they look at me funny. But it’s no different than using other food in your hair like olive oil and eggs. ACV can leave your hair soft, silky and smooth and acts as a natural conditioner without chemically damaging your mane. After cleaning your hair with baking soda, seal your hair cuticles by combining 1 part water to 1 part ACV. Pour onto your hair starting from the roots or use a spray bottle to evenly distribute. Let sit for 1-2 minutes. Rinse out hair completely with cold water. At the end of a shower, always rinse hair out with cold water to lock in moisture.
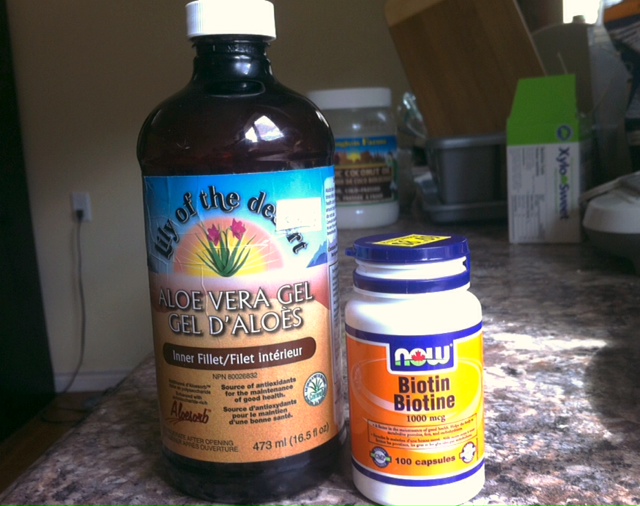
Pure castor oil, aloe vera and biotin vitamins – These are all excellent natural hair growth stimulants. These help the hair grow by reducing the overproduction of sebum which is an oily substance that your scalp secretes daily. Excess amounts of it can clog pores which in turn slow hair growth. Castor oil and aloe vera can be applied topically once a week. My favourite brand of aloe vera is the one by Lily of the Desert because it’s 99.5% certified organically grown aloe vera. Biotin vitamins, which can be found at your local health store, can be taken 1-2 a day at 1000 mcg a capsule. The brand I’m taking right now is by NOW and retails for about $6-$9 for 100 capsules.
A healthy diet – You know how it goes folks. A healthy inside will mean a healthy outside. Drink lots of filtered water. Eat lots of dark leafy greens. Stay away from sugar, salt, wheat and even alcohol to keep your locks healthy and strong. Eating healthy fats also help to keep hair strong like raw almonds, avocado and extra virgin olive oil.
Keep it low maintenance – Stop doing too much to your hair. If you want to grow a healthy head of locks, refrain from buying useless products or dying your hair. Keep away from the heat appliances and blow dryers. Instead, do a light towel rub after your shower then let your hair air dry. I’ve been doing this for years! Keep it simple. Try a product-free regime using only the natural ingredients listed above. Wash your hair less often or try the “no poo” method to regain your hair’s naturalness. Sounds gross now but this will help your hair recover from the years of styling and product buildup. You will need a few weeks to get used to it but your hair will thank you.
Long hair, take care.
Gluten Free Coconut Blueberry Cake….For One.

#WHATHEALTHYMODELSEAT
Try this simple recipe below and have it for dessert or even breakfast!
It’s made with organic coconut flour which is high in dietary fiber and low in carbs and calories. Cake can be healthy too, ya know.
2 tablespoons of organic coconut flour
1/4 teaspoon of baking soda
1 organic free range egg (or 1 flax egg = 1 tbsp of flax meal plus 4 teaspoons of water)
3 tablespoons of dairy free milk (unsweetened vanilla almond or coconut milk will do)
1/4 teaspoon of pure vanilla extract
Pinch of pure stevia powder (can omit if desired)
2 tablespoons of fresh blueberries, chopped
Optional: unsweetened cacao chocolate or unsweetened carob chips, chopped
Preheat oven to 350 F. Mix together flour and baking soda. Add egg/flax egg, milk, vanilla and sweetener (if using) and blend until well combined. Stir in blueberries and add ons. Lightly grease a ramekin or oven safe mug with coconut oil and pour thick batter into dish. Bake for 20 minutes. The top might be a bit gooey when you remove it from the oven but rest assure, it will set when it cools down. Cool cake for a few minutes before adding on toppings or devouring. I added coconut whipped cream (cream recipe found on this post), fresh raspberries and organic unsweetened coconut shredding for extra yumminess and ooiness!
Warning: Do not share this cake with anyone. There’s not enough for the both of you. 😉