

Healthy Breakfast Protein Fudge Bar – LifeMatrix Style

#WHATHEALTHYMODELSEAT
Is it possible to have chocolate for breakfast and have it be healthy? The answer is heck yeah! Nutella doesn’t count folks, sorry. (1 tablespoon of Nutella has 100 calories and 10 grams of sugar. Yikes! That’s a heavy sugar spike.)
So I made this raw chocolate fudge bar that’s gluten free, sugar free, egg free, dairy free, low carb and requires absolutely no baking. They’re great for on the go or if you want a little bit of chocolate indulgence with your cup of tea/coffee in the morning (or any time, really.) Did I mention that they are far healthier than any protein bar you’d buy at your local heath store?
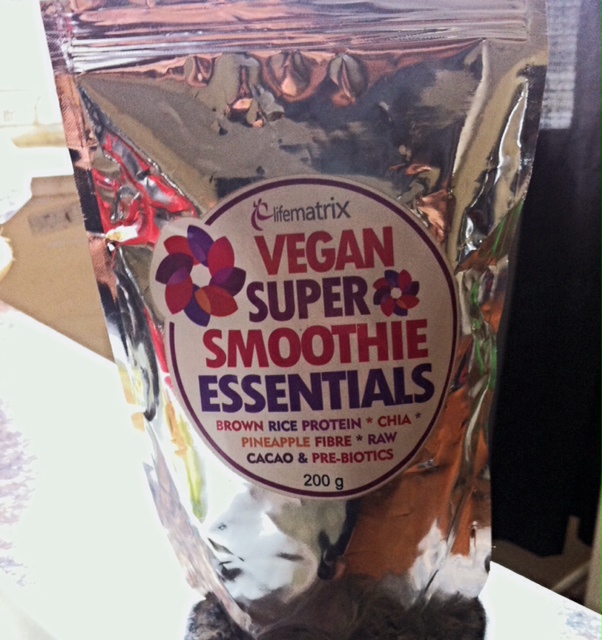
The main protein ingredient in this recipe comes from one of my favourite protein powders I bought in South Africa. (I also wish I stocked up on this product!) Lifematrix Vegan Super Smoothie Essentials is a gluten free, vegan, unsweetened protein powder made with organic powdered sprouted brown rice, chia, pineapple fiber, raw cacao and inulin. It has a light smooth taste and it doesn’t have that whey powder taste that a lot of leading macho protein powders have. Packed with protein and pre-biotics, it was the perfect nutritional base for my chocolate fudge bar. Since the powder is only available in South Africa (sad face), any brown rice protein will do like my other favourites Life Time Fitness Vegan Max or Progressive Organic Brown Rice Protein.
Brown rice protein is a convenient source of protein for those on a vegan or vegetarian diet and even for others that follow a strict healthy diet. Like other protein sources, brown rice protein can help with weight loss and management since it’s low in fat and generally low calorie. Recent research has also indicated that it can aid with muscle recovery and gain when consumed after a workout. It’s allergen-friendly and you can add it to almost anything: smoothies, cereal, juices and of course, this fudge bar!
It’s easy:
6 servings of brown rice protein (about 6 scoops)
6 tbsp of organic raw cacao (not cocoa!) powder (I like Navitas Natural Cacao)
6 tbsp of chia seeds
1/4 cup of erythritol sweetener (Can be found at any health store or even Bulk Barn!)
1/4 tsp of stevia extract powder (can omit if you don’t want it to sweet)
1 and 1/2 cups of unsweetened organic coconut milk (Almond milk will also work but your bars might be a little more on the creamier side)
6 tbsp of organic pure unsweetened almond butter, room temperature
1 tbsp of pure vanilla extract
6 tbsp of filtered water
In a large mixing bowl, combine all dry ingredients together. Using a spoon, add in coconut milk, almond butter and vanilla. Add in water. Mixture might be crumbly, which is better! With your hands, form into a large ball of dough. The dough should eventually feel play-doh like. Press onto parchment paper dusted with cacao and form into a large square and then cut into desired small strips. Dust the top with more cacao. You can top it with unsweetened coconut shredding and/or almond flakes. Store covered in fridge. Grab a square at your tummy’s discretion.
*The texture of the bars are very soft, cookie dough like. If you add a little more liquid, it will be a little more creamy. They do firm up in the fridge but won’t harden and will soften up if left at room temperature.
KEEN-WA

#WHATHEALTHYMODELSEAT
When in doubt, make quinoa.
Pronounced “keen-wa.” A friend of mine eats it all the time and a few weeks ago at a casting, he caught me off guard by calling it “que-noa!” It is quite a fancy word yet some of us have never been told how to properly say it.
But what is this powerful little grain that we’ve all been obsessing over? Well, for those who are on wheat/gluten free permanent hiatus, this grain can do wonders. Or if you’re planning on quitting a wheat free belly or cutting down on simple carbs, quinoa is a fantastic substitute.
Quinoa contains more vitamins and nutrients than any other grain. It is one of the most protein rich foods you can have in your diet and contains all essential amino acids which is rare to find in grains. Even better than brown rice. Low in fat, high in iron and fiber and promotes a healthy digestion, it is no wonder why it’s been dubbed as one of the world’s super foods!
Tonight I couldn’t figure out what to eat, so my go to dish is this simple and deliciously filling bowl. It’s quick to make and contains everything I need: protein, veggies and healthy grains/carbs.
All you need:
1/2 cup of quinoa
1 cup of spinach
1 cup of kale
Handful of arugula
Broccoli
1/4 of chickpeas and/or lentils (soaked and washed) – optional
Pine nuts
Lemon
Extra virgin olive oil or avocado oil
Pepper and/or seasoning to taste (NO SALT!)
Bring 1 cup of water to a boil. Stir in quinoa. Simmer on low heat for about 8 minutes covered. Add in chopped kale, broccoli and lentils/chickpeas while there’s still a bit of water left in the pot. Add 1/5 of water if necessary. Cook for another 7 minutes or until water is absorbed. Take off heat and fluff with a fork. Let stand for a few minutes. Prepare your plate by tossing spinach and arugula with pine nuts. Drizzle with oil and one squeeze of lemon. Add cooked quinoa with veggies and toss all ingredients. Season with some black pepper. And voila! Healthy good food made easy.
I paired my bowl with my homemade gluten/wheat/dairy free flax flat bread. I will share that recipe with you on another day. It was really good by the way! 😉
Model Friendly Milkshake – Allergen Free

My milkshake brings all the boys to the yard.
Vanilla milkshakes are nostalgic, delicious and underrated.
Do you remember the vanilla milkshakes we used to get as a kid with our McDonald’s happy meals? The small size alone is a whopping 530 calories and contains at least 65 grams of sugar! Yikes. That’s almost half the caloric intake for a woman trying to maintain her weight. And you already know how I feel about sugar. 😉 But I had a hankering for something “sweet” last night yet didn’t want to eat anything heavy especially before going to bed.
So here is a waaaay healthier version of the classic vanilla milkshake. It’s vegan. It’s gluten free. It’s grain free. It’s low carb. It’s low in calories. It’s super easy. And it doesn’t go straight to your hips!
All you need is your trusty blender, 1.5 cups of organic (original or vanilla) unsweetened almond milk, 1 teaspoon of alcohol free pure vanilla extract or flavouring, pure stevia (1 packet will do) and an ice cube tray. Combine all the ingredients into a bowl. Stir well. Pour into the ice cube tray (or any plastic container) and transfer into the freezer. Wait for it to firm up and freeze completely. (You’ll need patience for this.) Once the milk is frozen, blend the mixture in the blender until evenly creamy and frothy. You can add more almond milk if you want it to be thicker. You can also add another pack of stevia if you have more than one sweet tooth. If you want your milkshake to be less traditional, you can add 1 teaspoon of chia seeds, 1 scoop of protein powder, 1 tablespoon of organic cinnamon and/or fresh berries.
And they’re like it’s better than yours. Damn right, it’s better than yours.
#THISISSOUTHAFRICA
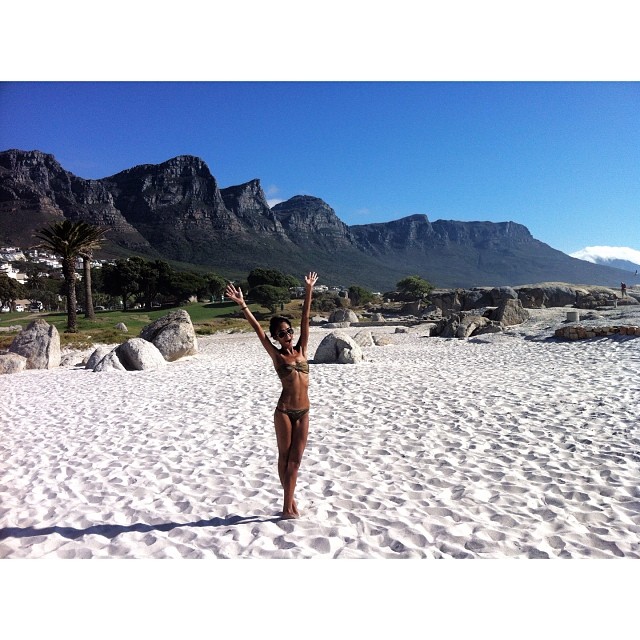
Life’s better on the beach.
My soul is most happiest when my toes are touching the ocean and when my skin is against the warm white sand. Cape Town, South Africa has one of the most beautiful beaches that are so pure and unspoiled. I was lucky to have a lot of beach time during my days off. Most beaches were quite accessible – some of the best ones were about 5-10 minutes away within reach.
It’s important to have moments with mother nature in any way possible. Whether it’s going for a long stroll, hiking, canoeing, swimming, picnics at the park and of course my favourite, hitting the beach. Having these moments allows us to come to our breaths by letting go and marinating ourselves in our inner peace and happiness. Not only do we inhale fresh oxygen, we soak up one of mother nature’s powerful nutrients: Vitamin D.


Homemade Vegan Pesto Sauce

#WHATHEALTHYMODELSEAT
Pesto is the besto!
I can’t get enough of pesto. It trumps red sauce any day.
Usually I buy a vegan pesto sauce at my local heath store but this time I wanted to make my own. The one I always buy uses sunflower oil which isn’t comparable to extra virgin cold pressed olive oil. Olive oil offers more health benefits and is a more natural oil compared to vegetable oil. I also kept this recipe vegan. It’s an affordable way to have creamy pesto and you can customize it to your taste buds. Plus, it’s homemade! 😉 This recipe makes a creamier pesto rather than an oily or textured one.
2 cups of loosely packed FRESH basil with stems removed
2 cups of organic baby spinach (or kale – I haven’t tried it yet though)
1/4 cup of pine nuts
2 cloves of fresh peeled garlic, sliced
Black pepper
Extra virgin olive oil – you can try first with 2 tablespoons or 1/4 cup depending on your preference
2 tablespoons of fresh lemon juice
2 teaspoons of unsweetened almond milk
Extra virgin olive oil
2 tablespoons of hemp seed (optional but a great way to get a little more protein)
1 teaspoon of dried or fresh oregano and parsley
Simply combine all the ingredients into your blender or food processor until thick and creamy or until desired consistency. You can additional olive oil to “thin” out the sauce a bit. Mix with cooked gluten free brown rice pasta (or really anything you want) and serve with fresh arugula. If you have baby basil leaves, top it as a garnish.
Always add olive oil to the very top layer and refrigerate to keep it moist and fresh. Bon appetit!
Easy Homemade Kale Chips
#WHATHEALTHYMODELSEAT
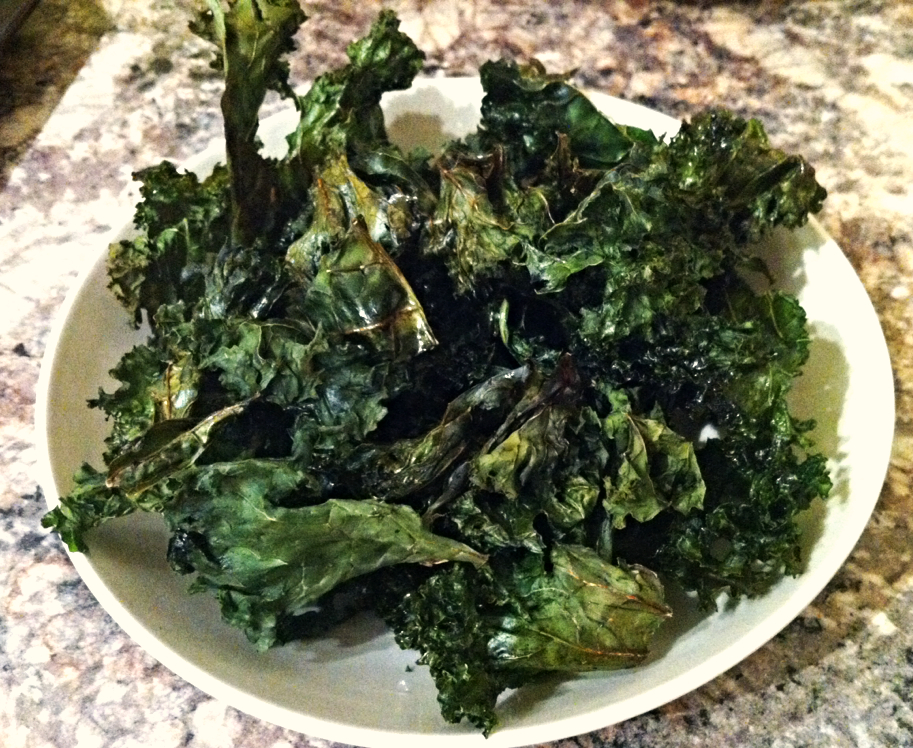
All hail Kale.
Kale is one of the healthiest veggies around town. I try to have it regularly in my diet in order to receive the fantastic health benefits it has to offer. You can have it in so many different ways. Of course, one of the best ways to have it is raw or lightly steamed. But another way I enjoy the flavor and nutrients from Kale is to bake it to make crispy chips.
There are a few companies that provide packaged Kale chips sold at your local health store but they can be very pricey or loaded with sodium. So make your own. All you have to do is preheat your oven to 350 degrees, wash your Kale stalk and dry thoroughly, rip off small pieces (don’t have them too big), line a baking sheet with aluminum foil, add kale, drizzle 2 tablespoons of extra virgin olive oil (or coconut oil), toss and mix with hands then bake for 10-15 minutes. Turn oven off. Refrain from eating right away. Leave in the oven for another 10 minutes to “dehydrate” or you can leave them out. You can also top with black pepper, himalayan sea salt, nutritional yeast or paprika for added taste.
From the garden to your oven, this is a low calorie snack that’s easy to make and yummy to eat. Lays chips are so last season.
I love me some green juice!

#WHATHEALTHYMODELSEAT
I finally smell springtime in Toronto.
One of my favourite everyday activities to do is to take really long walks in the city. It’s a great way to exercise and also a fantastic way to check out new hot spots in different neighbourhoods.
I found this little organic cafe in the heart of the Junction. The Beet serves an array of healthy dishes from soups, salads, stews, and bowls which many of them are either gluten free, vegan or vegetarian. (They have organic meat as well.) I decided to pick myself and my boyfriend up some fresh juices to keep us hydrated and nourished for our walk to High Park. They were delicious.
I love me some green juice! An excellent way to get your veggies in. Someone buy me a juicer for my birthday, please! 🙂
Easiest Gluten Free Vegan Pancakes You’ll Ever Make
#WHATHEALTHYMODELSEAT
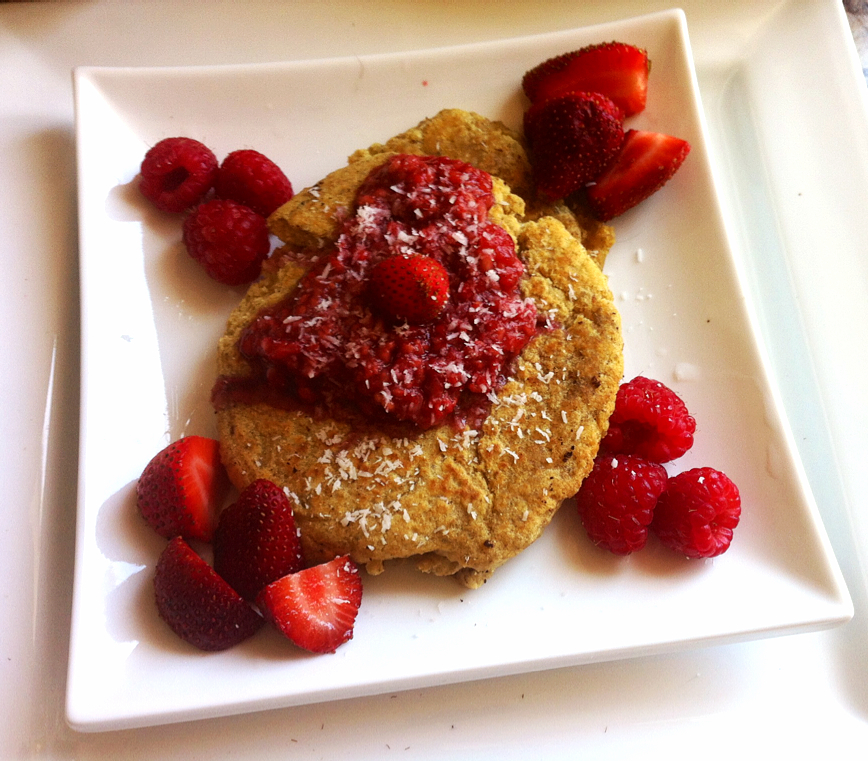
Pancakes that are gluten free, sugar free, vegan and dairy free. Score!
My favourite breakfast food are pancakes. It’s just an excuse for me to start my day off with yummy carbs! 😉 I generally like making pancakes made with coconut flour like my previous recipe post because they’re lower in carbs and calories. It’s a lot more “fluffy” and “cakey” like. But I wanted some that were more like buttermilk pancakes and more dense. This new recipe is made with brown rice flour, which is gluten free of course! Use Bob’s Red Mill brown rice flour which you can get almost anywhere these days. ($3.99 at Loblaws.) I made the first batch this morning. I used a lot of coconut oil for frying so the outer layer came out crispier. Still delicious! Keeping my (natural) sugar intake low, I topped it with melted raspberries and unsweetened shredded coconut and served it with a side of berries. The other batch came out more fluffy (less oil) and topped it with pure almond butter. Win-win.
1 and 1/2 cup of whole grain brown rice flour
2 teaspoons of baking soda
1 and 1/4 cup of dairy free milk of choice (I use unsweetened almond)
1 tablespoon of apple cider vinegar (I hear you can use pure lemon juice as well)
2 flax or chia egg (1 tbsp ground flax/chia seed + 3 tablespoons of water)
3 tsps of coconut oil (can omit if desired)
Additional add ons: organic cinnamon, cacao powder, berries, coconut shredding, coconut palm sugar, stevia, etc.
Whisk the milk and the apple cider vinegar together and let stand for a few minutes to create “buttermilk.” Then, mix the dry ingredients together in another bowl. Add the wet ingredients together and mix well. If the batter is lumpy, it’s better! Pour pancakes into a preheated, lightly greased (with coconut oil) skillet on medium heat. Flip pancakes when they start to bubble. Enjoy with fresh toppings of choice!
These make a lot of pancakes! Roughly 6. Make em big or as small as you like depending on how hungry you are. I’m always hungry.

Model Eats: Hibiscus Love

#WHATHEALTHYMODELSEAT
Kensington’s best kept secret gluten free cafe.
Hibiscus, hibiscus, hibiscus! That’s the name of the cafe where I had this bowl of unique vegan goodness. It is one of my favourite spots to lunch at! Located in the heart of Toronto’s vibrant Kensington market, Hibiscus offers only fine gluten free, vegan and vegetarian options that are not only scrumptiously healthy but affordable too! (You won’t find anything here for more than $10.00)
My two girlfriends and I lunched here last week and we all ordered their popular salad bowl. My friend Natalie was so impressed that she managed to take a quick picture of it before happily devouring it. There was a bevy of tasty ingredients happening: quinoa, sweet potato, broccoli, kelp, beets, beans, kale and okara. Served with a raw cracker, this definitely hit the spot.
While you’re there, make sure to try their (gluten free) savoury and sweet crepes with a cup of warm matcha tea latte. It’s also a popular place for dairy free ice cream with an assortment of flavours like almond chocolate, coconut, raspberry coconut, pistachio….you drooling yet?
Oh and for those of you who are Justin Nozuka fans – he’s often seen here lunchin’. 😉
Menu: www.hibiscuscafe.ca
BTS of Lalimalu


Behind the scenes of my shoot for Lalimalu Jewelry.
Lisa Marie Schneider x Dylan Culhane x Laura Elizabeth Parkes